It’s best to fill in any cracks with filler or putty and then sand it down to create a smoother surface, rather than simply trying to paint directly over the cracks. Larger cracks may require specialty repair.
Preparing walls for painting is crucial when decorating or remodeling a room. Prep work might take time, and it’ll certainly require a little effort, but it all pays off in the long run. With proper preparation, your painting project will go much more smoothly and produce far better results.
WHAT YOU'LL NEED
Before you get started, you'll need to assemble a few things. Here are some of the key supplies you may need:
- Valspar® Stain-blocking Bonding Primer/Sealer or Valspar® High-Hiding Primer/Sealer
- Filler or patching compound
- Paintable caulk and caulk gun
- Sandpaper
- Rags and cloths
- Cleaning solution
- Painter's tape
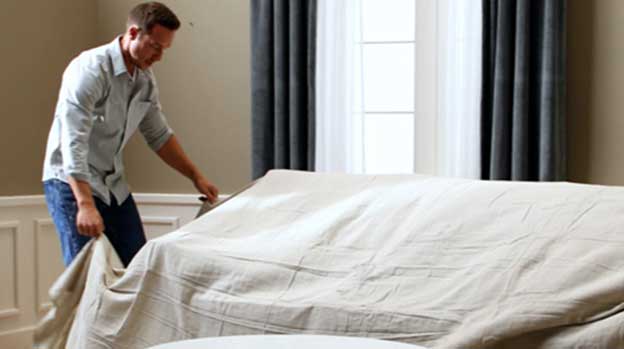
You may also require some drop cloths to cover the floor, as well as for covering up any large items of furniture that you're not able to remove from the room before you begin. Try to take out smaller and lighter items, as well as artwork and decorative items to keep them safe and give you more space to maneuver.
If you’re not quite sure how much primer you’ll need, use our paint calculator. It’ll give you an accurate estimate, based on the size and scope of your project.
INSTRUCTIONS FOR WALL PREP BEFORE PAINTING
So, how to prep a room for painting? Well, it might seem like quite a big job at first, but if you break it down into smaller steps, it should feel more manageable. Here are the main things you’ll need to focus on when prepping a room for painting.
STEP 1: REPAIR WALLS
Over time, imperfections in a wall will turn into imperfections in the paint. The best way to avoid this is by starting with a smooth surface. Walls can pick up little nicks and knocks from time to time, and you might need to do a few little touch-ups before you start spreading any paint across the wall. Take a close look at the walls to get started, looking for any common problems like loose or flaked paint to scrape away, or any holes or cracks that may need filling in and sanding down.
STEP 2: CAULKING, IF NEEDED
Sometimes, the trim in your home can separate slightly from your walls. While this is common, you’ll want to take care of it before painting. If you see separation, fill in the gaps with paintable caulk – and it should be dry and paintable within the hour.
STEP 3: SAND WALLS
Sanding walls before painting is not usually recommended. However, if you are starting with a glossy surface, you may want to sand it dull before painting.
STEP 4: CLEAN WALLS
Another part of preparing walls for painting is to clean them. After all, you don’t want to leave any dirt, dust, or cobwebs on the surface, as the paint can clump up around those dirty areas and make them much more visible. Dirt and dust can also prevent the painting sticking to the wall as it should. Wipe the walls down with water and mild detergent or cleaning solution.
STEP 5: TAPE YOUR EDGES
Next, you’ll need to start taping off the areas where you don’t want to make a mess when you start painting. Put strips of painter’s tip along the trim and the edge of the walls. You may also want to take out any outlet or switch covers or put tape over and around them, so they don’t get splashed with paint.
STEP 6: PRIME YOUR WALLS
Valspar® Stain-blocking Bonding Primer/Sealer can help if you need to cover any existing stains or dark patches that might otherwise be visible through the paint. If the stains are not treated, they are likely to bleed through the paint – even after applying several coats. If you a going from a dark to light paint color, use Valspar’s High-Hiding Primer/Sealer for best results. Make sure to let the primer completely dry before applying paint.
Not sure if you need to prime? Visible stains or drastic color changes are the most common reasons to prime, but there are other benefits, too. Check out our Primer How To for more.
Now, you’re all ready to paint. Painting is the easiest way to transform a room, and prepping right is the easiest way to get great results. So as long as you take the time to do it right, you’ll be painting like a pro before you know it.
Preparing Walls for Painting FAQs
Use a filler material to fill up the holes and then sand it down so it’s in line with the rest of the wall.
Typically, 150 to 200-grit sandpaper should be used on walls. Avoid anything under 100-grit, as it can be too rough and may cause damage.
You only need to lightly sand the wall in most cases, just to give it a slightly grittier feel to help the paint stick.
It may not be necessary, but it is recommended, as this will help to avoid the paint sticking to bits of dust and dirt.
Use a soft-bristled broom to sweep away the dust. You can also use a vacuum cleaner.
Use water and a mild detergent to clean the walls. Apply with a clean rag or cloth.
Give the walls a few hours to dry off before applying any primer or paint. Open windows to speed up the drying process.
WARNING! Removal of old paint by sanding, scraping or other means may generate dust or fumes that contain lead. Exposure to lead dust or fumes may cause brain damage or other adverse health effects, especially in children or pregnant women. Controlling exposure to lead or other hazardous substances requires the use of proper protective equipment, such as a properly fitted respirator (NIOSH approved) and proper containment and cleanup. For more information, call the National Lead Information Center at 1-800-424-LEAD (in US) or contact your local health authority.
Adequate ventilation required when sanding or abrading the dried film. If adequate ventilation cannot be provided wear an approved particulate respirator (NIOSH approved). Follow respirator manufacturer's directions for respirator use.
