It is difficult to evenly sand a textured wall. Attempting to do so can also knock down its texture, so it is not recommended in most cases.
Knowing how to paint textured walls is crucial if you want to redecorate a room with little bumps and indentations along the wall. However, it’s not always easy. In fact, painting textured walls is often a little trickier than painting smooth and even walls, as brushes and rollers can pass over the little indents and nooks without actually leaving any paint behind. This guide is here to help, covering all you need to know about painting over textured wallpaper and surfaces.
THE DECISION TO PAINT YOUR TEXTURED WALLS
If you have textured wall surfaces or wallpaper, you might hesitate about painting over them. However, while it can take a little more time and requires a little more effort compared to smooth walls, painting textured walls really isn’t as difficult as you might imagine. And, when it comes to how to make textured walls look modern, painting them is the simplest and cheapest choice.
A fresh coat of paint can totally transform a textured wall, adding new life and elegance to the entire room. And it doesn’t need to be a difficult process. If you have the right supplies, good quality paint, and the proper technique, painting or spraying textured walls can be quick, easy, and even fun.
WHAT YOU'LL NEED
Here are some of the key supplies you’ll need for painting textured walls:
- Valspar Reserve® Interior Paint + Primer
- Primer is optional (see below for details), but if your project needs it, we recommend using Valspar® High-Hiding Primer/Sealer or Valspar® Multi-Surface Primer/Sealer
- Valspar® Wall Trim Flat 2.5-In Brush
- Valspar® 9-in x ½-in Textured Walls, Concrete and Decks Knit Roller Cover
- Valspar® Quick Release Roller Frame
- Painter's tape
- Paint tray
- Rags
- Drop cloths
- Putty knife and filler
- Sandpaper
Of course, the amount of paint you need will depend on the size of the project. Bigger walls need more paint, and it can be tricky to work out exactly how many tins to buy if you simply try to judge it on your own. To make things easier try our handy paint calculator tool. It’ll tell you how much paint you need, based on the size of your textured walls.
PREPARING TEXTURED WALLS FOR PAINTING
Before you actually start painting your textured walls, you will need to prep them. By preparing your textured walls for painting, you’ll save yourself a lot of time and hassle later on. Here are some key steps to follow before painting over textured wallpaper.
STEP 1: CLEAN THE WALL SURFACE
To begin, you’ll need to clean the walls. Use a lightly damp cloth and mild soapy solution to wipe away any dirt, dust, hairs, and surface-level stains from the wall surface. If you have delicate wallpaper on the walls, just use a dry cloth to wipe away the dirt. This will prevent the paint clumping and sticking to hairs or grime when you start painting the textured walls.
STEP 2: REPAIR ANY DAMAGE
Give your walls a quick check-up to look for any signs of damages, like little cracks and holes. You won’t want to paint over those damages, as the paint will clog up in the holes and cracks and make a mess. Instead, take a moment to repair them, using filler material and your putty knife. Sand the filler down to make it match the rest of the wall.
STEP 3: REMOVE OUTLET AND SWITCH COVERS
If you happen to have any power outlets or switches on the textured wall you plan to paint, now is the time to remove them. Unscrew any of the covers and set them aside until you’ve finished painting. This is an important step of how to paint textured walls, as it prevents the covers from being splashed with paint.
STEP 4: TAPE THE EDGES
Finally, we recommend using painter’s tape along the edges of the wall. Run tape all along the edge where the wall meets the corner, as well as at the base and trim. This is done to prevent any paint getting into areas you don’t want it. And when you remove the tape after painting the textured walls, you’ll have nice, neat, straight lines.
HOW TO APPLY PAINT TO TEXTURED WALLS
With the prep all done, it's time to move on and paint your textured walls.
STEP 1: PRIME YOUR WALL
Applying primer is only necessary in certain situations. For instance, if hiding a previously used bright or dark color, you could use Valspar High-Hiding Primer. If covering up any deep stains or marks on the wall, consider using Valspar Multi-Surface Primer.
STEP 2: CUT IN EDGES
For best results when painting textured walls, it's best to start off at the edges and cut inwards. This should help you get straight lines along the edge when you take away the tape later on.
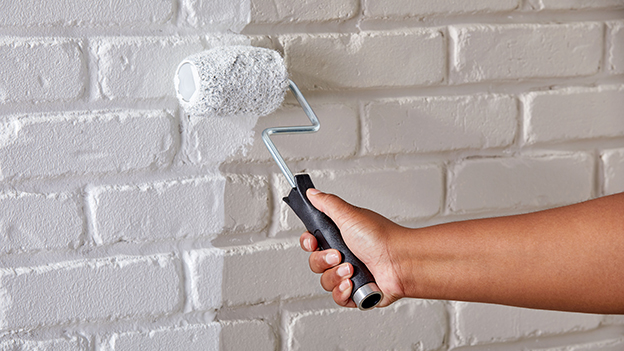
STEP 3: ROLL PAINT ON TEXTURED SURFACES
With the edges taken care of, switch from a brush to a roller. Choose a roller designed for painting textured walls and start working. Use straight lines and move up and down along the wall, section by section.
STEP 4: APPLY A SECOND COAT
When painting textured walls, you may need a second coat. This helps to fill in any of the little gaps and missed areas that might have been overlooked the first time around.
STEP 5: CLEANING UP
With the painting done, it's time to clear up. Get rid of the painter's tape, reinstall your outlet covers, remove the drop cloths, and bring furniture back into the room to finish it off.
Painting Textured Walls FAQs
A knit roller cover can work really well on textured walls to provide smooth and even coverage over little gaps and indentations.
They can be, as brushes and rollers may miss some of the little indents, but with time and the right supplies, paining textured walls doesn’t need to be difficult.
