
Actual color may vary from on-screen representation.
WHAT YOU'LL NEED
STEP 1: ROOM PREP
First, pick a color that will make the wall stand out while also complimenting the entire room. If you need inspiration check out Valspar’s color tools! Once you move any furniture and prep the wall, you’re ready to make the room pop.

STEP 2: MEASURE SHELF HEIGHT
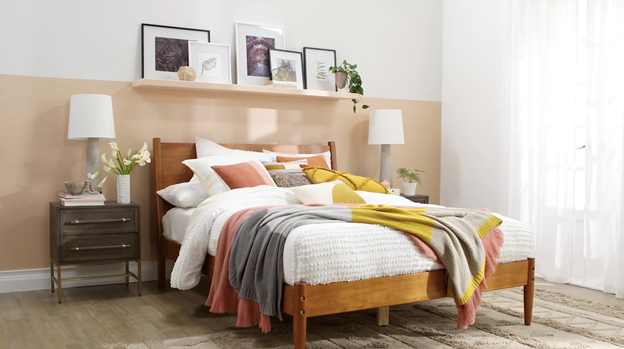
A two-toned wall can really give your room a stylish focal point by making the room appear larger and stand out. Use a shelf to bolden the divide and mount additional decor. Measure your desired shelf height and use a level to apply a horizontal line of tape across the width of the wall. Your accent color will fill the space below the line.
STEP 3: PAINT
Prime your walls and then get to painting! Cut in around the taped edges on the sides, trim and molding, then finish with the roller. Once the paint is dry you’re ready to add that extra bit of flair.
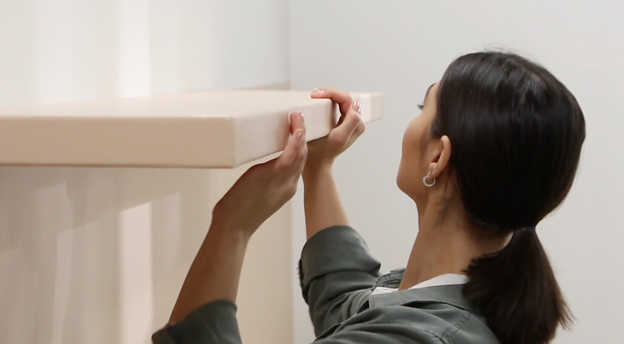
STEP 4: ADDING A SHELF
Adding another element to your wall makes it even more striking and functional. Even a simple board can be transformed into a statement shelf when you apply the same color paint to that you used for the lower half of the room. Remember to always paint in the direction of the grain.
When you're ready to hang the unit, position the shelf at your desired height and secure it to the wall using the necessary brackets, screws and hangers.
Done! These simple additions can turn your space from ordinary to extraordinary.